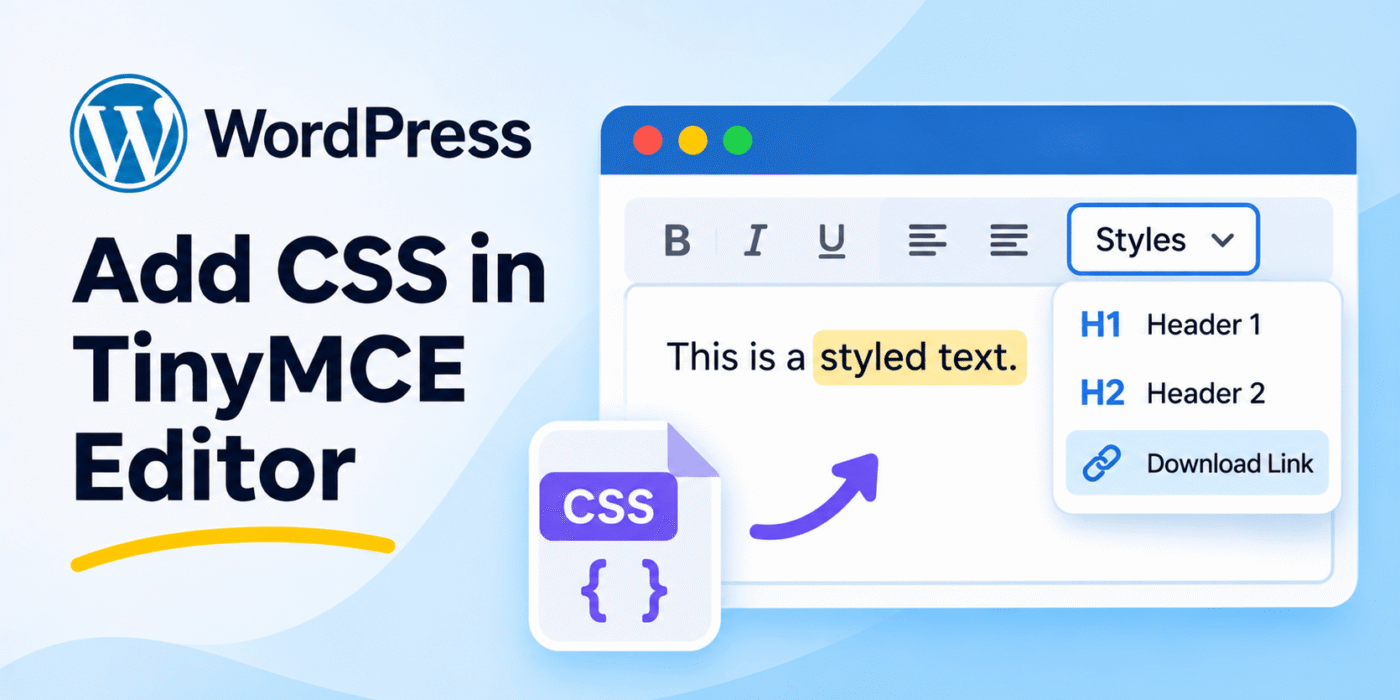
TinyMCE is the rich text editor used by the WordPress Classic Editor. It provides formatting options that allow users to add headings, links, lists, and other content without writing HTML manually.
Sometimes the default formatting options are not enough. You may want to add custom styles to the editor, such as a download link style, highlighted text, custom heading formats, or special content blocks.
WordPress provides filters that let developers customize the TinyMCE toolbar and its formatting options. In this tutorial, we will add a custom Styles dropdown, define custom formats, and load a stylesheet into the editor.
1. Add the Styles Dropdown to the TinyMCE Toolbar
By default, the TinyMCE Styles dropdown may not be visible in the WordPress Classic Editor toolbar.
You can add it using the mce_buttons_2 filter. Add the following code to your theme’s functions.php file or a custom plugin:
<?php

function geekerhub_mce_editor_buttons( $buttons ) {

    array_unshift( $buttons, 'styleselect' );

    return $buttons;
}

add_filter(
    'mce_buttons_2',
    'geekerhub_mce_editor_buttons'
);
The styleselect button adds the Styles dropdown to the second row of the TinyMCE toolbar.
2. Add Custom Styles to the TinyMCE Dropdown
After adding the Styles dropdown, you need to define the formats that should appear inside it.
WordPress provides the tiny_mce_before_init filter to modify TinyMCE configuration options before the editor initializes.
The following example adds custom heading formats and a Download Link style:
<?php

function geekerhub_tiny_mce_custom_formats( $init_array ) {

    $style_formats = array(
        array(
            'title' => 'Headers',
            'items' => array(
                array(
                    'title' => 'Header 1',
                    'format' => 'h1',
                ),
                array(
                    'title' => 'Header 2',
                    'format' => 'h2',
                ),
                array(
                    'title' => 'Header 3',
                    'format' => 'h3',
                ),
            ),
        ),
        array(
            'title' => 'Download Link',
            'selector' => 'a',
            'classes' => 'download',
        ),
    );

    $init_array['style_formats'] = wp_json_encode( $style_formats );

    return $init_array;
}

add_filter(
    'tiny_mce_before_init',
    'geekerhub_tiny_mce_custom_formats'
);
Now the Styles dropdown will contain a Headers group with three heading options and a Download Link format.
The format option applies a block or inline format, while selector targets an existing HTML element. The classes option adds a CSS class to the selected element.
For example, selecting the Download Link format applies the download class to the selected link.
3. Merge Custom Styles with the Default TinyMCE Formats
If you want to keep the default TinyMCE formats and add your custom formats alongside them, use the style_formats_merge option.
Add the following line to the initialization array in the previous example:
$init_array['style_formats_merge']= true;
Your configuration will then include both the custom formats and the default formats provided by TinyMCE.
4. Understand the Available Style Format Options
TinyMCE supports several options for defining custom formats. These options help you control how a selected element is formatted.
- title: The label displayed in the Styles dropdown.
- inline: Creates an inline element around the selected text, such as a
span. - block: Applies a block-level element, such as a
divorblockquote. - format: Applies a predefined TinyMCE format, such as
h2,bold, oritalic. - selector: Targets existing elements that match a CSS selector.
- classes: Adds one or more CSS classes to the selected element.
- styles: Applies inline CSS properties to the selected element.
- attributes: Adds HTML attributes to the selected element.
- wrapper: Creates a wrapper element around the selected content.
- exact: Controls whether TinyMCE can combine similar formatting styles.
You can combine these options to create formats for links, paragraphs, headings, and other content elements.
5. Add More Custom Formats
You can add more options to the Styles dropdown by extending the $style_formats array.
For example, the following configuration adds inline formatting, block elements, and text alignment options:
<?php

function geekerhub_tiny_mce_extended_formats( $init_array ) {

    $style_formats = array(
        array(
            'title' => 'Inline',
            'items' => array(
                array(
                    'title' => 'Strikethrough',
                    'format' => 'strikethrough',
                ),
                array(
                    'title' => 'Superscript',
                    'format' => 'superscript',
                ),
                array(
                    'title' => 'Subscript',
                    'format' => 'subscript',
                ),
                array(
                    'title' => 'Code',
                    'format' => 'code',
                ),
            ),
        ),
        array(
            'title' => 'Blocks',
            'items' => array(
                array(
                    'title' => 'Blockquote',
                    'format' => 'blockquote',
                ),
                array(
                    'title' => 'Preformatted',
                    'format' => 'pre',
                ),
                array(
                    'title' => 'Div',
                    'block' => 'div',
                ),
            ),
        ),
        array(
            'title' => 'Text Styles',
            'items' => array(
                array(
                    'title' => 'Highlighted Text',
                    'inline' => 'span',
                    'classes' => 'highlight-text',
                ),
                array(
                    'title' => 'Small Text',
                    'inline' => 'span',
                    'classes' => 'small-text',
                ),
            ),
        ),
    );

    $init_array['style_formats'] = wp_json_encode( $style_formats );
    $init_array['style_formats_merge'] = true;

    return $init_array;
}

add_filter(
    'tiny_mce_before_init',
    'geekerhub_tiny_mce_extended_formats'
);
This example creates three groups in the Styles dropdown. You can add or remove formats based on the requirements of your website.
6. Add a Custom Stylesheet to the TinyMCE Editor
Adding a CSS class through TinyMCE does not automatically define how that class should look. You also need to load the relevant CSS rules into the editor.
For example, if you created a highlight-text class, you can define its appearance in a custom stylesheet.
Create a file named my-editor-styles.css inside your plugin directory and add the following CSS:
.highlight-text {
    background-color: #fff2a8;
    color: #333333;
    padding: 2px 5px;
}

.small-text {
    font-size: 12px;
}

a.download {
    color: #ffffff;
    background-color: #2271b1;
    padding: 8px 14px;
    text-decoration: none;
    border-radius: 4px;
}
Next, use the mce_css filter to load this stylesheet into the TinyMCE editor:
<?php

function geekerhub_add_tinymce_editor_styles( $mce_css ) {

    $editor_css = plugin_dir_url( __FILE__ ) . 'my-editor-styles.css';

    if ( ! empty( $mce_css ) ) {
        $mce_css .= ',';
    }

    $mce_css .= $editor_css;

    return $mce_css;
}

add_filter(
    'mce_css',
    'geekerhub_add_tinymce_editor_styles'
);
Make sure the CSS file exists at the specified location. If you add this code to a theme instead of a plugin, use the appropriate theme directory URL.
You should also add the same CSS rules to your frontend stylesheet. The mce_css filter loads styles inside the editor, but it does not automatically apply them to the public-facing website.
7. Remove the Default Format Dropdown
TinyMCE may display a separate Formats dropdown in addition to your custom Styles dropdown.
If you do not need the default Formats dropdown, you can remove the formatselect button using the mce_buttons filter.
<?php

function geekerhub_remove_format_dropdown( $buttons ) {

    $formatselect_position = array_search(
        'formatselect',
        $buttons,
        true
    );

    if ( false !== $formatselect_position ) {
        unset( $buttons[ $formatselect_position ] );
    }

    return $buttons;
}

add_filter(
    'mce_buttons',
    'geekerhub_remove_format_dropdown'
);
This removes the default Formats dropdown from the first toolbar row while keeping the custom Styles dropdown added through mce_buttons_2.
Important Notes
- Classic Editor: These examples are intended for the WordPress Classic Editor and its TinyMCE integration.
- Custom formats: Use
tiny_mce_before_initto configure the Styles dropdown. - Editor CSS: Load custom styles into TinyMCE and add matching rules to your frontend stylesheet.
- Merge default formats: Set
style_formats_mergetotrueif you want to retain the default TinyMCE formats. - Check your toolbar: The position of buttons depends on the toolbar row where you register them.
- Test your output: Check the HTML generated by each custom format to make sure it matches your theme’s CSS.
Conclusion
You can customize the WordPress TinyMCE editor by adding a Styles dropdown, defining custom formats, and loading your own stylesheet.
The mce_buttons_2 filter adds the Styles button, tiny_mce_before_init defines the available formats, and mce_css loads the CSS into the editor.
These options let you create a more useful editing experience without installing an additional plugin.