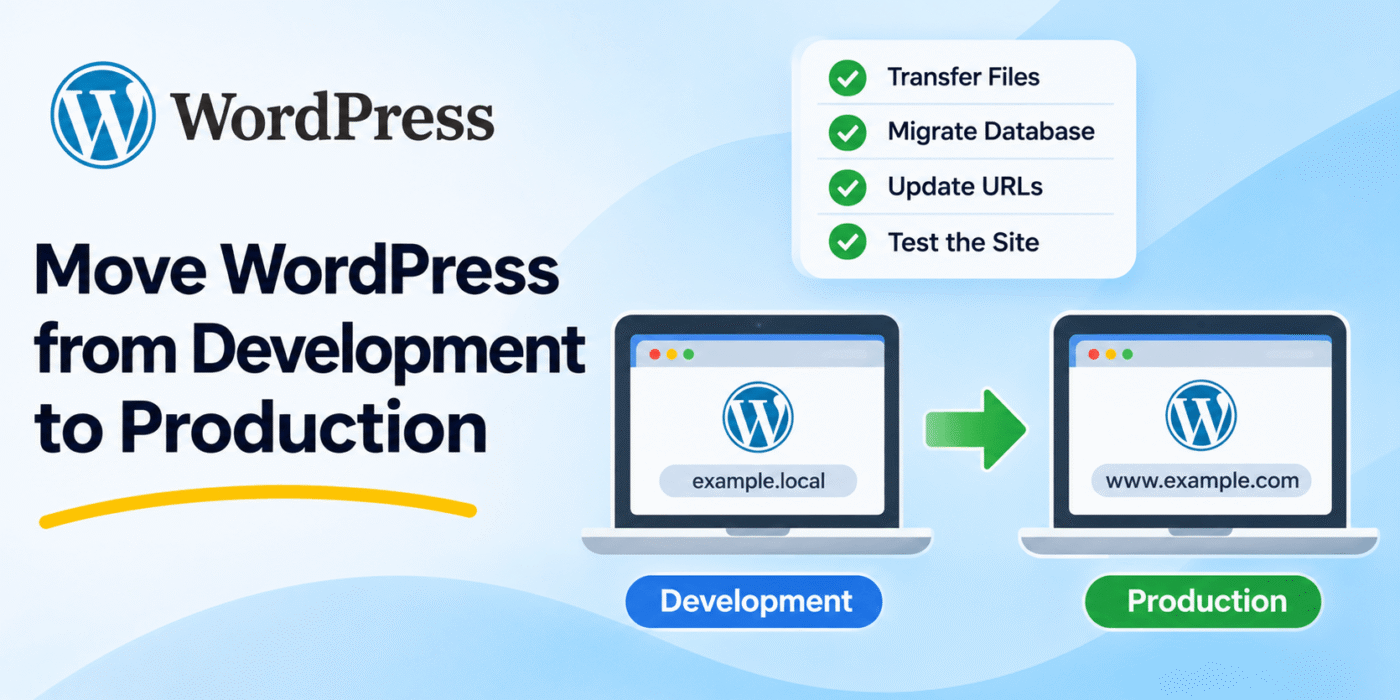
Moving a WordPress website from a development environment to a live production server is a common task for developers. You may have finished building a custom theme, developing plugins, or adding new website functionality locally. The next step is to transfer those changes to the production website.
A WordPress migration involves more than uploading files. You also need to move the database, update website URLs, check configuration settings, and verify that everything works correctly on the live server.
In this tutorial, we will cover a practical process for moving a WordPress website from development to production, including database migration, file transfer, URL replacement, and final testing.
1. Prepare Your Development Website
Before moving your website, make sure the development environment is ready for deployment.
- Check that the theme and plugins are working correctly.
- Remove temporary debugging code and development-only settings.
- Check for broken links, missing images, and PHP errors.
- Make sure the WordPress version and PHP requirements are supported by the production server.
- Keep a backup of the development website’s files and database.
If you have developed a custom WordPress plugin, review its code and configuration before deploying it. You can also read our guide on creating a custom plugin in WordPress.
2. Upload WordPress Files to the Production Server
The first step is to transfer the required WordPress files from your development environment to the production server.
You can use an FTP or SFTP client such as WinSCP to upload files. If your hosting provider offers SSH access, you can also use command-line tools such as rsync.
Depending on your deployment method, the files you may need to transfer include:
- Custom theme files.
- Custom plugin files.
- Required uploads and media files.
- Other custom application files.
If WordPress is already installed on the production server, avoid replacing the entire installation unnecessarily. Deploy only the files that need to be updated, and make sure you do not overwrite production-specific configuration files.
3. Back Up the Production Database
Before importing the development database, create a complete backup of the existing production database.
This step is especially important if the live website already has customers, orders, comments, user accounts, or other data that has been created since development began.
Importing the complete development database over the production database can replace newer production data. For example, a WooCommerce store may lose orders and customer information created after the development database was copied.
For websites that receive regular updates or transactions, do not assume that replacing the entire production database is safe. Plan a deployment that preserves the production data or migrates only the required changes.
4. Export and Import the WordPress Database
For a complete website migration, export the development database and import it into the production environment.
You can use phpMyAdmin, your hosting control panel, or command-line database tools to perform this operation.
For example, export the development database using MySQL:
mysqldump -u development_user -p development_database > development.sql
After transferring the SQL file to the production environment, import it into the target database:
mysql -u production_user -p production_database < development.sql
Replace the database names and usernames with the actual values for your environments.
Important: Importing a complete database can overwrite existing production data. Use this method only when a full database replacement is intended and you have a verified backup.
5. Update the Development Domain to the Production Domain
After importing the database, you may still find references to the development domain in WordPress settings, post content, menus, widgets, and plugin data.
For example, your development website might use:
https://example.local
And your production website might use:
https://www.example.com
You need to replace the development URL with the production URL. However, a simple SQL search-and-replace query can damage serialized WordPress data because serialized values may contain stored string lengths.
A safer option is to use the WordPress command-line interface (WP-CLI), which supports serialized data replacement.
wp search-replace 'https://example.local' 'https://www.example.com' --all-tables-with-prefix --dry-run
The --dry-run option lets you preview the changes without modifying the database. Review the results first. If they are correct, run the command without --dry-run:
wp search-replace 'https://example.local' 'https://www.example.com' --all-tables-with-prefix
Make sure you use the correct source and destination URLs, including the appropriate protocol and www preference. Review custom tables separately if a plugin stores URLs outside the WordPress table prefix.
You can find more information in the official WP-CLI search-replace documentation.
6. Configure wp-config.php for the Production Environment
The wp-config.php file contains important WordPress configuration settings, including database credentials and security keys.
When moving a website to production, verify that the database settings match the production database:
define( 'DB_NAME', 'production_database' );

define( 'DB_USER', 'production_user' );

define( 'DB_PASSWORD', 'your-secure-database-password' );

define( 'DB_HOST', 'localhost' );
Use the actual database credentials supplied by your hosting provider. Do not publish real database passwords in tutorials, public repositories, or shared code snippets.
If you maintain separate development, staging, and production environments, you can use environment variables to manage configuration values rather than hardcoding different credentials in the same file.
For example:
define(
    'DB_NAME',
    getenv( 'WP_DB_NAME' ) ?: 'development_database'
);

define(
    'DB_USER',
    getenv( 'WP_DB_USER' ) ?: 'development_user'
);

define(
    'DB_PASSWORD',
    getenv( 'WP_DB_PASSWORD' ) ?: ''
);

define(
    'DB_HOST',
    getenv( 'WP_DB_HOST' ) ?: 'localhost'
);
Configure the environment variables on the server before using this approach. The fallback values in this example are for development only and should not expose production credentials.
Keep sensitive configuration outside publicly accessible directories where possible, and restrict access to the configuration file.
7. Use Separate Settings for Development, Staging, and Production
If you regularly move websites between environments, maintaining separate configuration settings can make deployment easier.
For example, a project may have the following environments:
- Development: The local environment used for coding and testing.
- Staging: A testing server used to verify changes before deployment.
- Production: The live website accessed by visitors and customers.
Each environment may require different database credentials, domain names, API keys, and file paths.
Instead of storing these values directly in application code, keep them in environment-specific configuration. This makes it easier to deploy the same theme and plugin code across different servers.
For example, a third-party integration may use a test API key on development and a live API key on production. Keeping these values separate helps prevent accidental use of development credentials on the live website.
8. Test the Production Website
Once the files and database have been migrated, test the production website before announcing the deployment.
Use the following checklist:
- Open the homepage and check that it loads correctly.
- Test important pages, posts, and custom post types.
- Check navigation menus, images, and internal links.
- Test contact forms and other submission forms.
- Check user registration and login if your website supports them.
- Verify that the SSL certificate and HTTPS redirects work correctly.
- Check plugin functionality and theme behavior.
- For WooCommerce stores, test the cart, checkout, payment, and shipping configuration without creating unintended live transactions.
- Check the website for PHP errors and missing resources.
After testing, visit Settings > Permalinks in the WordPress dashboard and save the settings if you need WordPress to refresh its rewrite rules.
Also clear relevant caches, including WordPress caching plugins, server cache, and CDN cache.
9. Can You Automate WordPress Migration?
Yes. You can use migration tools to simplify the process of moving WordPress files and databases between environments.
Some tools provide database export, file transfer, URL replacement, and migration options through a guided interface. These can be useful when you need to move a complete website without manually performing every step.
However, migration tools do not automatically solve every deployment problem. A full database migration can still overwrite production data, and custom plugins may require additional configuration or migration logic.
For websites with custom database tables or complex integrations, review how each plugin stores its data before migrating.
Important Notes
- Do not overwrite production data accidentally: A complete development database import can replace live orders, users, comments, and other records.
- Use secure file transfer: Prefer SFTP or SSH over unencrypted FTP when transferring website files.
- Protect credentials: Never include real database passwords or API keys in publicly shared code.
- Handle serialized data correctly: Use a WordPress-aware search-and-replace tool instead of a basic SQL replacement query.
- Check file permissions: Make sure WordPress can access required files and directories without granting unnecessary permissions.
- Keep backups: Back up both the database and files before starting a deployment.
- Use staging: Test the migration process on a staging server before applying it to production.
Conclusion
Moving a WordPress website from development to production requires careful handling of files, database records, domain references, and configuration settings.
For a simple website, you can transfer the files, migrate the database, update the URLs, and verify the live installation. For a website that receives regular orders, registrations, or other user activity, use a deployment process that preserves production data instead of replacing the entire database.
With proper backups, environment-specific configuration, and thorough testing, you can make WordPress deployments more reliable and reduce the risk of problems after launch.